


This guide breaks down every step so you can restore your bumper cover with confidence and know when it is time to reach out for expert support.
Scrape vs. Scratch vs. Scuff
Before working on a scratched bumper, it helps to understand what type of mark you are dealing with. These terms are often used interchangeably, but they describe different kinds of damage.
Scuff
A scuff is a surface level mark that usually affects only the outer layer of the bumper. Rubber transfer from another car or object is common. These are the easiest to fix and often disappear with a bumper scratch remover or light buffing.
Scratch
A scratch cuts into the bumper deeper than a scuff. Some scratches affect only the clear coat, while others reach the paint layer. The deeper the scratch, the more work required to fix it.
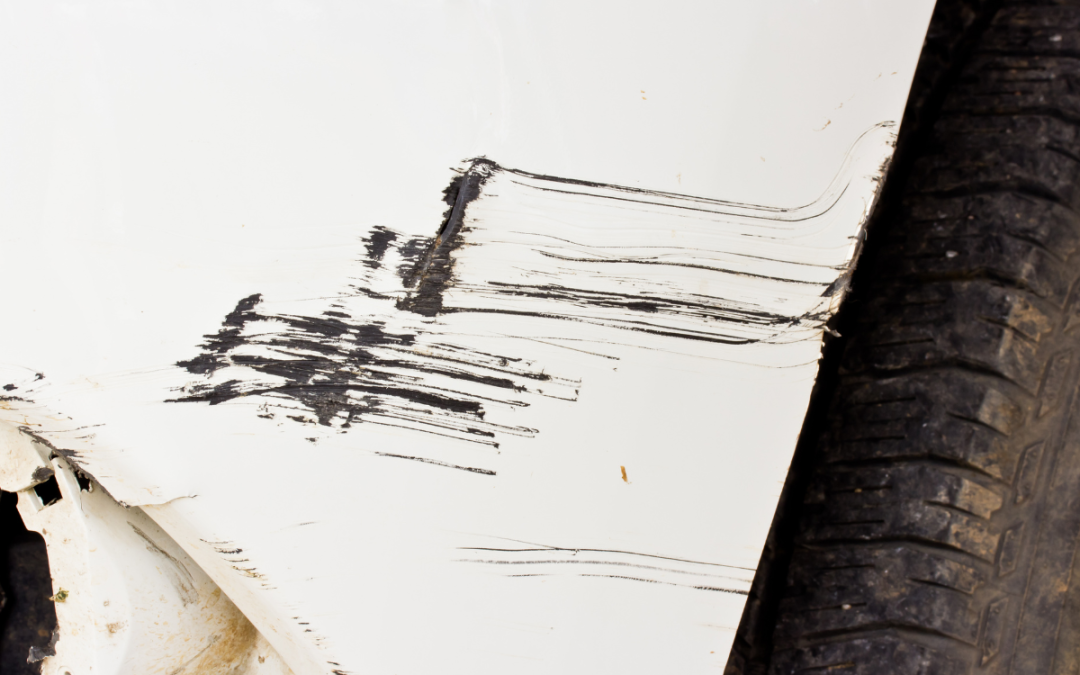
Scrape
A scrape is more aggressive than a scuff or light scratch. Scrapes often remove paint, expose the plastic underneath, or create rough edges. These require more detailed car bumper scratch repair techniques that involve sanding or filling.
Identifying the type of bumper scratches helps you estimate the time needed and decide how much repair effort is required.
Clean and Prepare the Surface for Repair
Before you attempt bumper scratch repair, the bumper must be clear of dirt, grease, and debris. A clean surface ensures your results look smooth and professional.
Step 1: Wash the area
Use car soap and warm water to remove dirt and road grime. Rinse well and dry with a microfiber cloth.
Step 2: Remove residue
Some scrapes leave behind paint from other objects. A gentle automotive adhesive remover can help lift this without harming your own paint.
Step 3: Inspect closely
Look at the bumper cover in bright light to understand the depth of the damage. What looks like a deep scratch is sometimes only residue that wipes away.
Step 4: Mask off nearby areas
Use painter’s tape to protect headlights, trim, and nearby panels before sanding or buffing.
A properly prepped surface sets the stage for smooth, even bumper paint repair results.

Decide on the Right Repair Method
Here are typical repair paths:
- Light scuffs: buffing and polishing
- Clear coat scratches: wet sanding and polishing
- Deep scrapes: sanding, filling, smoothing
- Exposed plastic: fillers and repainting
- Large worn areas: full refinishing
If the damage is more than a small scratch, knowing how long does it take to replace a bumper helps you compare repair time with replacement time.
Buffing Out Light Scrapes and Surface Marks
Buffing is the fastest way to remove scrapes from plastic car bumper areas when the damage is shallow.
Step 1: Apply polishing compound
Use a foam applicator pad and rub the compound in a circular motion.
Step 2: Buff lightly
An electric polisher makes the process faster, but hand buffing works for small scuffs.
Step 3: Wipe and inspect
Clean the area with a soft cloth to see if the scratch has improved.
Step 4: Repeat if needed
Some surface marks require a second round.
Buffing works best for surface level damage that does not reach the paint. It is quick, safe for most plastic bumpers, and requires minimal tools.
Repairing Deeper Scrapes: Filling, Sanding, and Smoothing
Deeper scrapes that expose the plastic or create uneven lines need more detailed car bumper scratch repair steps.
Step 1: Sand the damaged area
Use fine grit sandpaper to smooth rough edges. Sanding prepares the surface for filler while removing loose material.
Step 2: Apply plastic filler
Plastic filler is designed for bumper covers and flexible surfaces. Spread a thin layer over the scrape and let it dry.
Step 3: Sand again for smoothness
Use progressively finer grit sandpaper to level the area and blend it into surrounding surfaces.
Step 4: Apply primer
Primer helps paint adhere correctly and prevents the repaired spot from standing out.
These steps restore the shape of the scratched bumper and prepare it for final refinishing.
Refinishing and Color Matching Plastic Bumpers
When deeper scrapes affect the paint layer, refinishing becomes necessary.
Step 1: Choose matching paint
Use your car’s paint code to match the original color. This is especially important for older or vintage cars where colors vary more.
Step 2: Apply thin paint layers
Spray paint works well for small areas. Apply several thin coats instead of one thick coat to prevent runs.
Step 3: Add clear coat
The clear coat seals the color and gives the bumper a shine consistent with the rest of the car.
Step 4: Final polishing
Once the paint cures, polish the repaired area to blend it into the rest of the bumper.
A good color match makes the repair almost invisible, especially when the damage was limited to a small part of the bumper cover.
Protect and Maintain Your Bumper Post-Repair
Here are simple ways to protect it:
- Apply a protective wax coating
- Avoid parking too close to other vehicles
Wash the bumper regularly to remove debris - Use a bumper guard if you park on busy streets
- Avoid scraping curbs or objects while reversing
Consistent care helps keep the bumper in better shape over the long term.
When to Seek Professional Help or Replacement
Some scrapes are too deep or widespread to repair at home. Professional help is recommended when:
- The bumper is severely gouged
- Cracks run across large areas
- The paint is flaking or peeling
- Structural damage is suspected
- The repair area is too large to blend
- You want a factory finish appearance
Conclusion
Learning how to remove scrapes from plastic car bumper surfaces helps you decide whether a DIY solution is enough or if professional repair is needed. Light scuffs are easy to buff, while deeper scrapes require sanding, filling, and repainting. With the right approach, you can restore the appearance of your bumper and improve the overall look of your car while keeping the rear bumper fix cost within a reasonable range. When damage is too extensive, replacement may be the safer and more effective choice for long-term results.
Frequently Asked Questions
1. Can Buffing Alone Remove All Bumper Scrapes
Buffing works for shallow scuffs and surface marks, but deeper scrapes need sanding or filler.
2. Will a Diy Repair Match My Bumper’s Original Colour
A DIY repair can match well if you use the correct paint code, but professional color matching produces more consistent results.
3. How Much Time Does a Diy Bumper Repair Usually Take
Light repairs can take one to two hours. Deep scrapes that require filling and painting can take several hours or span over two days due to drying time.
4. Is Repainting a Bumper Worth It Compared to Replacing It
Repainting is worth it when the bumper is structurally sound. Replacement is better when cracks, deformation, or widespread damage make repair ineffective.
Recent Comments